To record live TV with IPTV, you need an IPTV app that supports recording, enough storage space on your device, and an active IPTV subscription — then simply press the record button while watching a live channel, or schedule a recording in advance through the Electronic Program Guide (EPG).
Unlike traditional cable, where you rent an expensive PVR box from your provider, IPTV lets you record directly to your streaming device, an external USB drive, or even the cloud, depending on the app you use. The answer to “can I record on IPTV?” is usually yes — but it’s not always straightforward: recording support varies by app, storage fills up fast, and a stream interruption can break a capture.
The steps below cover everything from checking support to troubleshooting failed recordings, so you never miss your favourite show, game, or movie again.
Can You Record on IPTV? Verify Support First
Recording is a feature of the app or service, not of IPTV itself — so before anything else, confirm that recording is actually supported in your setup:
Check your player app. Some IPTV apps have full DVR features; many lightweight players have none at all. The feature list in Section 3 tells you which is which.
Check your provider. Some IPTV services include cloud DVR or catch-up on their end; others deliver live streams only, leaving recording entirely to your app and device. Your provider’s feature page or support team can confirm in one message.
Check your device. MAG boxes, Android boxes, Fire Sticks, and Smart TVs each handle recording differently — some record to internal storage, some require external drives, and some (notably most iPads and iPhones with certain apps) support recording only in limited form.
Two minutes of verification here saves you from discovering mid-game that your record button doesn’t exist.
Know Your Three Recording Options
There are three distinct ways to “record” with IPTV, and knowing the difference shapes everything that follows:
Local recording. Your app captures the stream to a file on your device or USB drive. You control the file completely, but you supply the storage and the device must stay on.
Cloud DVR. The provider records on their servers and you stream the recording back later — no local storage needed. True cloud DVR is less common in IPTV and is typically a premium-provider feature, so confirm before counting on it.
Catch-up TV. Not recording at all, but often better: many providers keep a rolling replay window (typically 1–7 days) on popular channels, letting you watch what you missed without having planned ahead. If your provider includes catch-up and VOD, you may rarely need to record anything — check those features first.
The rest of this guide focuses on local recording, the method fully under your control.
Choose an IPTV App That Supports Recording
Not every app includes recording, so make sure yours does:
TiviMate — the best option on Android TV and Fire Stick, with scheduled recording, series recording, and manual start/stop controls.
OTT Navigator — recording with customizable file formats and quality settings; ideal for Android boxes and Fire Stick.
Kodi with a PVR add-on — turns your device into a full DVR system with timers, scheduled recordings, and local file storage.
GSE Smart IPTV — records on both Android and iOS, saves files locally, and lets you choose the storage location.
IPTV Smarters Pro — offers a basic recording function on some platforms, though availability varies by version and device.
MAG boxes — most include a built-in record function tied to a connected USB drive.
Avoid apps without recording: many lightweight players simply omit the feature, so confirm it exists before committing your setup to an app.
Prepare Your Storage
Recorded IPTV files are large, and running out of space mid-recording is the most common failure. Prepare before you press record:
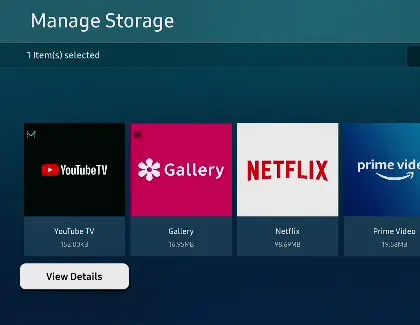
Check available space under Settings → Storage on your device.
Estimate file sizes: a one-hour recording takes roughly 1–2 GB in SD, 3–5 GB in HD, and 10–15 GB in 4K.
Use an external USB drive for dedicated recording storage — plug it into your Android box or Smart TV directly, or into a Fire Stick via an OTG adapter. A 64 GB drive holds roughly 12–20 hours of HD.
Set the default recording path in your app’s settings — internal storage, USB drive, or SD card — so recordings land where you expect them.
Record a Live Channel Manually
The simplest method: capture what you’re already watching.
Tune into the channel and confirm it’s playing cleanly, without buffering or freezing — a recording can only be as good as the stream.
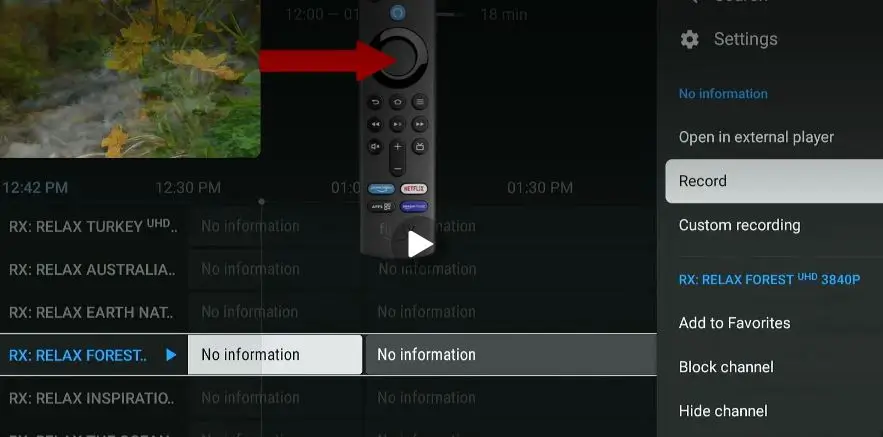
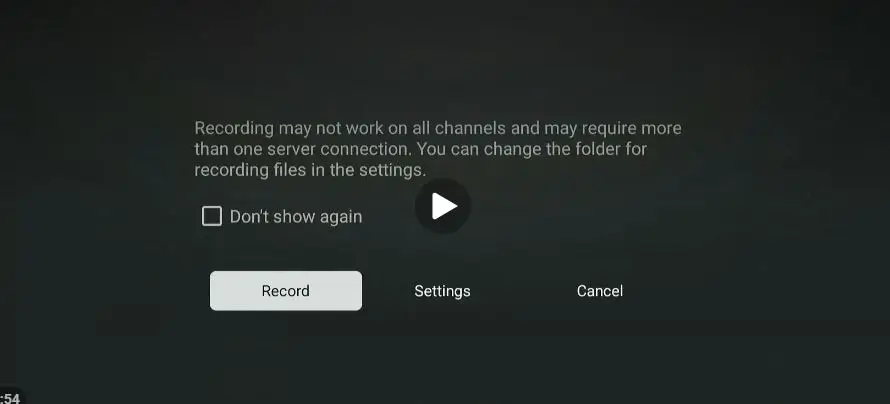
Press the record button — a red circle or “REC” icon in the player controls, usually revealed by pressing OK on your remote or tapping the screen.
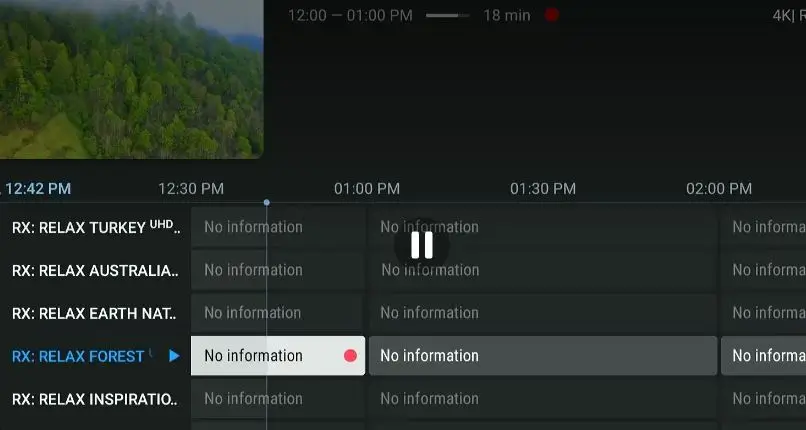
3. Confirm recording has started — a red dot or “Recording” indicator should appear on screen.
4. Keep the app open. On most apps, switching channels or closing the app stops the recording, so leave it running.
5. Stop manually when the program ends — press the record button again or select “Stop Recording” from the player menu.
6. Check the saved file in your app’s recording folder or on the external drive to confirm it plays back correctly.
Schedule Recordings Through the EPG
For programs airing while you’re away, schedule in advance:
Open the EPG (TV guide) in your app and navigate to the future program you want.
Long-press or select the program and choose “Record” or “Add timer” — apps like TiviMate let you set start/end padding (a few extra minutes on each side protects against schedule drift).
For weekly shows, use series recording where available (TiviMate, Kodi PVR) so every episode is captured automatically.
Leave the streaming device powered on and online. You can turn off the TV screen, but the device itself must stay awake — disable aggressive sleep settings, or the timer will silently fail.
Confirm accurate EPG data first: a guide that’s off by an hour records the wrong program, so fix any time-shift offset before relying on scheduled timers.
Find and Play Back Your Recordings
Open the Recordings/DVR tab in your app’s main menu, where captured files are listed.
Sort by date or channel with the built-in filters to find specific programs quickly.
Play back in the app with full controls — pause, rewind, fast-forward, and skip.
Use VLC or MX Player if your app can’t play a particular file; both handle virtually every video format.
Transfer, Organize, and Back Up
Recordings saved to a USB drive are portable: unplug the drive and play the files on a computer, laptop, or another streaming device. To keep your library healthy:
Delete watched recordings promptly — at 3–5 GB per HD hour, storage disappears faster than you expect.
Rename files meaningfully if your app names them by channel and timestamp.
Back up recordings you care about to a computer or personal cloud storage, so a failed device or wiped storage doesn’t take your library with it.
Troubleshoot Failed or Broken Recordings
Recording stopped partway. Usually the app was closed, the device slept, or storage filled up. Keep the app in the foreground, disable sleep, and check free space before long recordings.
File won’t play. Try VLC first. If the file is corrupt, the stream likely dropped mid-recording — buffering during capture writes gaps into the file.
Scheduled recording never started. The device was asleep or offline, or the EPG time was wrong. Fix power settings and verify guide accuracy.
Recording is choppy but live TV is fine. Slow storage is the usual culprit — cheap USB flash drives can’t sustain HD write speeds; use a quality drive or record to internal storage.
Record button missing. Your app or platform version doesn’t support recording — switch to one of the apps in Section 3.
Know the Practical Limits
Recording quality equals stream quality. The file captures exactly what was broadcast — no app can record in better quality than the live stream, and any live buffering ends up in the file.
Recording doesn’t use extra bandwidth when capturing the channel you’re watching; recording one channel while watching another, however, runs two streams at once and requires both app support and sufficient bandwidth.
Connection limits still apply. A background recording can count as a simultaneous connection on some plans — check yours if recordings cut off when a second device starts streaming.
Keep it personal. Record for your own time-shifted viewing; redistributing recorded content is a different matter legally, and provider terms of service generally prohibit it.
Frequently Asked Questions
Does IPTV have recording?
Yes — but it’s a feature of your app and provider, not IPTV as a whole. Apps like TiviMate, GSE Smart IPTV, Kodi with PVR, and OTT Navigator support it; many lightweight players don’t. Recording quality always matches your live stream quality.
Does IPTV have catch-up?
Many providers offer catch-up on select channels — a rolling replay window of the past 1–7 days that often removes the need to record at all. Availability varies by channel and provider, so confirm with customer support.
Does IPTV have video on demand?
Yes — most quality IPTV services include VOD libraries with thousands of movies and series. Selection, video quality, and features like parental controls vary by provider.
Do I need extra equipment to record?
Not necessarily — internal storage works. An external USB drive is strongly recommended for longer recordings, though, both for capacity and to keep your device’s storage free.
Can I record one channel while watching another?
Sometimes. Apps like TiviMate support background recording, but it runs two simultaneous streams — you need enough bandwidth, and your subscription’s connection limit must allow it.
How much storage do I need?
Plan for 3–5 GB per hour of HD and 10–15 GB per hour of 4K. A 64 GB USB drive holds roughly 12–20 hours of HD recordings.
Can I schedule a recording and turn off my TV?
You can turn off the TV screen, but the streaming device must stay powered on and connected to the internet — disable sleep mode or the timer will fail.
Is there a cloud recording option?
Some premium providers offer true cloud DVR, and many more offer catch-up TV, which replays recent programs without any recording on your part. Check your provider’s feature list.
Will recording affect my streaming quality?
No. The recording captures the stream as it plays, so it uses no extra bandwidth and loses no quality — the recording and the live stream are identical.
Conclusion
Recording live TV with IPTV is genuinely better than the cable-era PVR — no rented box, no monthly DVR fee, and your recordings live on storage you own. The recipe is simple once the pieces are in place: an app with real DVR features (TiviMate leads the pack), a quality USB drive with room to spare, accurate EPG data for scheduled timers, and a device that stays awake when you’re not around. Check whether your provider’s catch-up and VOD already cover what you’d record — often they do — and remember that a recording can only ever be as good as the live stream behind it, which makes a stable, reputable IPTV provider the real foundation of a reliable DVR setup. Set your first timer tonight, confirm the file plays back tomorrow, and you’ll never plan your evening around a broadcast schedule again.



 Written by Rana