How to Set Up IPTV on TiviMate ? (Step by Step)

To set up IPTV on TiviMate, install the app on your Android device, open it and tap “Add Playlist,” choose Xtream Codes or M3U, enter the details from your provider, then let it load — your channels, guide, and on-demand content appear automatically. TiviMate is a popular IPTV player known for its clean, cable-like interface and excellent program guide, but it’s only a player: it doesn’t include any channels of its own.
To watch anything, you’ll need a reliable IPTV Subscription, a legal service from a licensed provider — that gives you Xtream Codes credentials or an M3U link. This guide walks you through all ten steps, from installing TiviMate to fixing the most common issues.
TiviMate is an Android-only IPTV player. Install it, tap “Add Playlist,” pick Xtream Codes (recommended) or M3U, enter your provider’s details, and your channels load in a minute or two. Xtream Codes pulls in the guide automatically.
1. Understand What TiviMate Is
Before you start, it’s important to know what TiviMate does and doesn’t do, since many people assume it provides channels. In reality, TiviMate is a media player: it organizes and displays a stream you supply, with a polished interface and strong guide features. Without a subscription, it opens but stays empty.
- TiviMate is an IPTV player app, not a channel provider.
- It connects using Xtream Codes, an M3U link, or a portal.
- It’s prized for its program guide (EPG) and cable-like layout.
- You’ll still need an active, legal IPTV subscription to watch.
2. Check Device Compatibility and Prerequisites
TiviMate runs on Android-based devices only, so confirming your hardware first saves disappointment. It works on Android TV boxes, Android-based streaming sticks, and Android phones or tablets, but not on iOS or non-Android Smart TVs directly. Gather your details before you begin.
- Make sure your device runs Android (TV box, stick, phone, or tablet).
- Have your subscription details ready: server URL, username, password (or M3U link).
- Confirm a stable internet connection.
- Note that TiviMate isn’t available on iOS or non-Android TVs.
3. Install TiviMate on Your Device
Installation is quick on any Android device. On a device with the Google Play Store, you install it directly; on a streaming stick without the Play Store, you’ll typically sideload it. If you’re setting up on an Android TV box or stick, our Android TV IPTV guide covers the device-level steps in more detail.
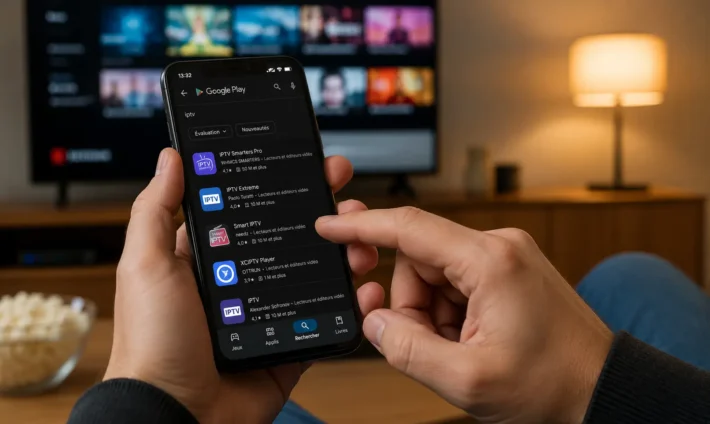
On Android TV/phone, open the Google Play Store and search for “TiviMate.”
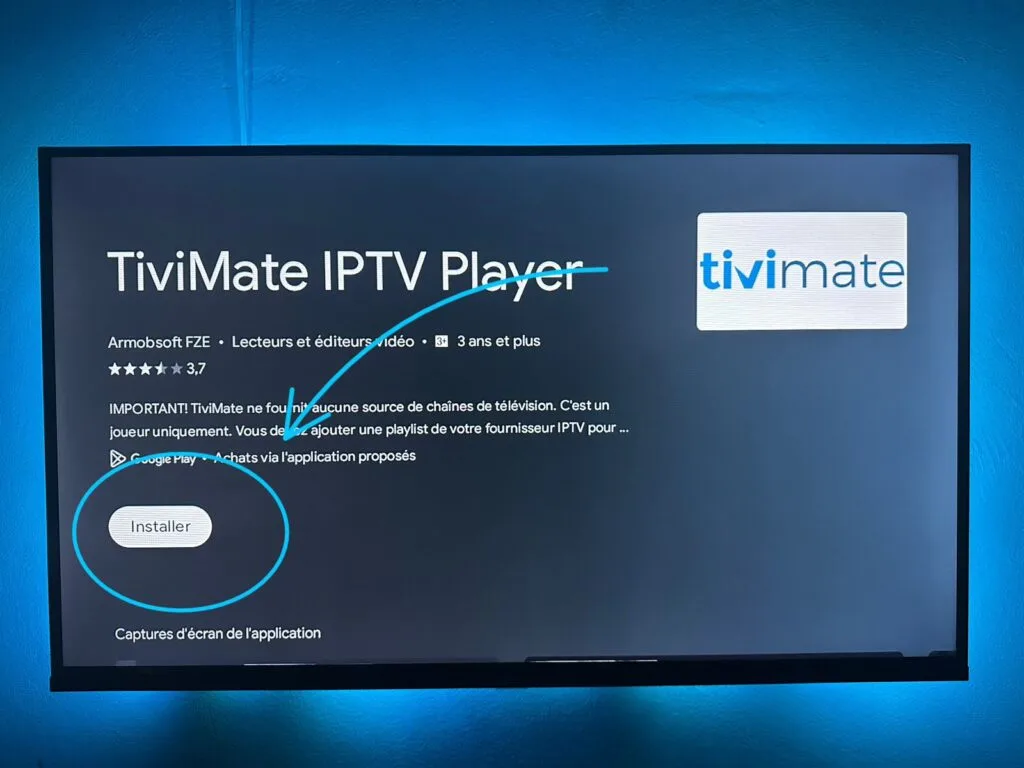
Select Install and wait for the download to finish.
On a stick without the Play Store, enable unknown sources and sideload it.
Open TiviMate once it’s installed.
4. Open TiviMate and Start “Add Playlist”
The first time you launch TiviMate, it greets you with a clean screen and a single prompt to add a playlist. This is where you connect your subscription. The app then guides you through the rest.
Launch TiviMate from your apps screen.
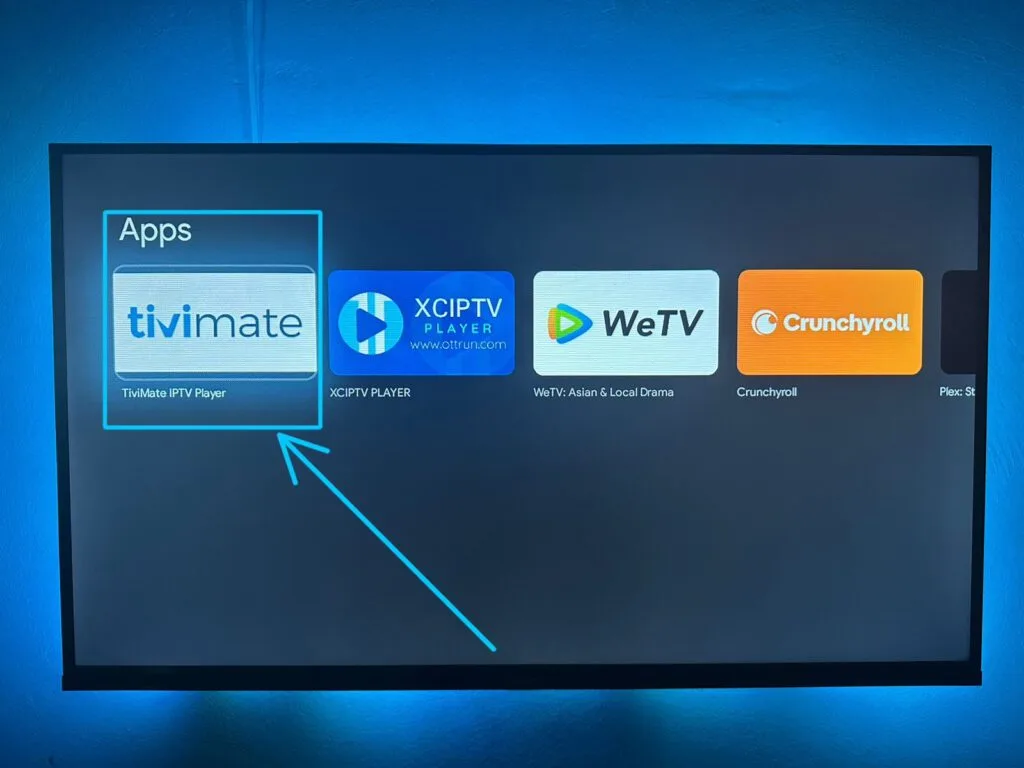
On the welcome screen, select the large “Add Playlist” button.
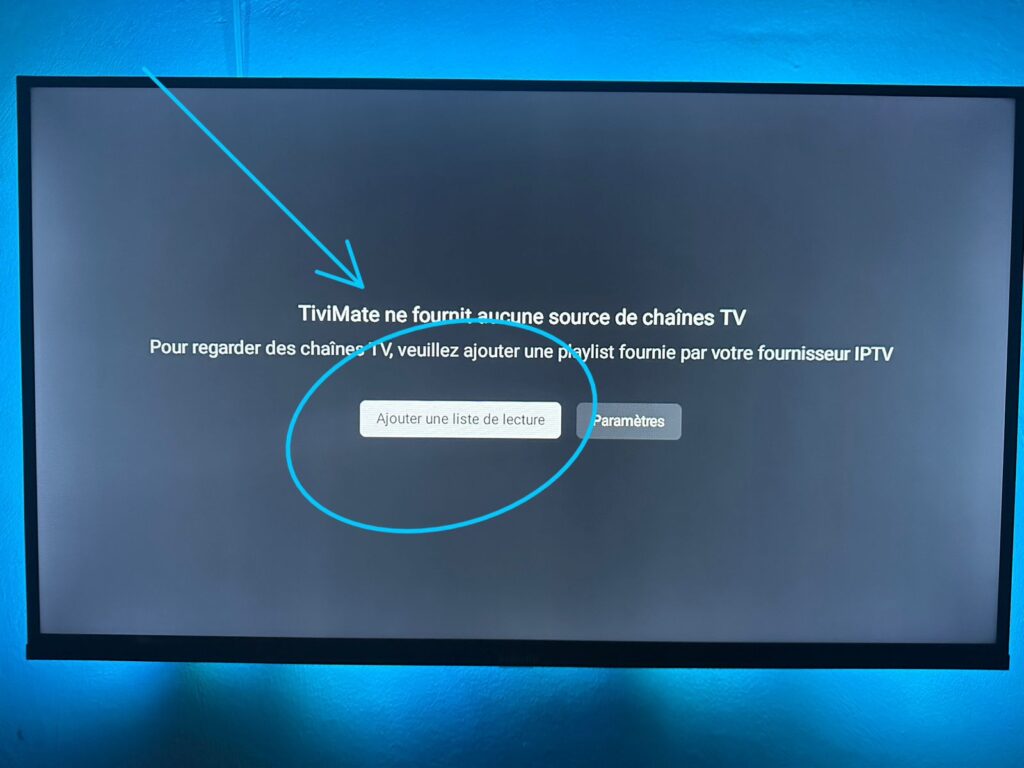
TiviMate will ask which type of playlist you want to add.
Have your provider’s details on hand for the next step.
5. Choose Your Playlist Type
TiviMate offers a few ways to connect, and the right one depends on what your provider gave you. Knowing the difference avoids confusion. For most people, Xtream Codes is the cleanest option because it also pulls in the guide automatically.
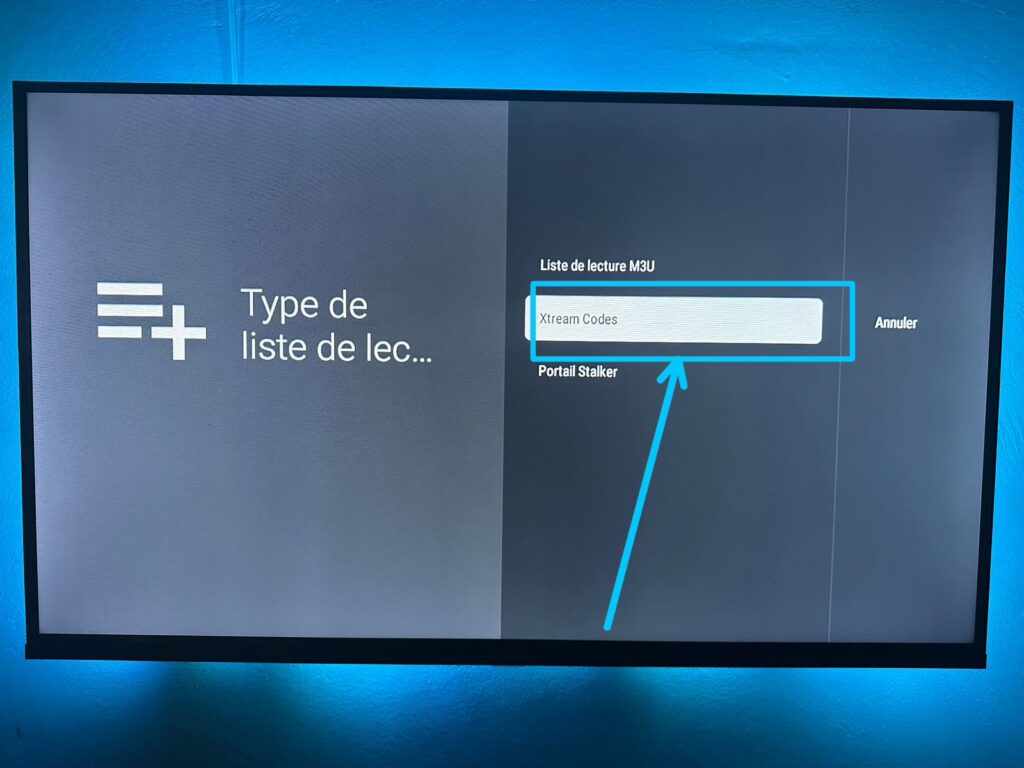
- Xtream Codes: a server URL, username, and password (recommended).
- M3U Playlist: a single long URL ending in .m3u or .m3u8.
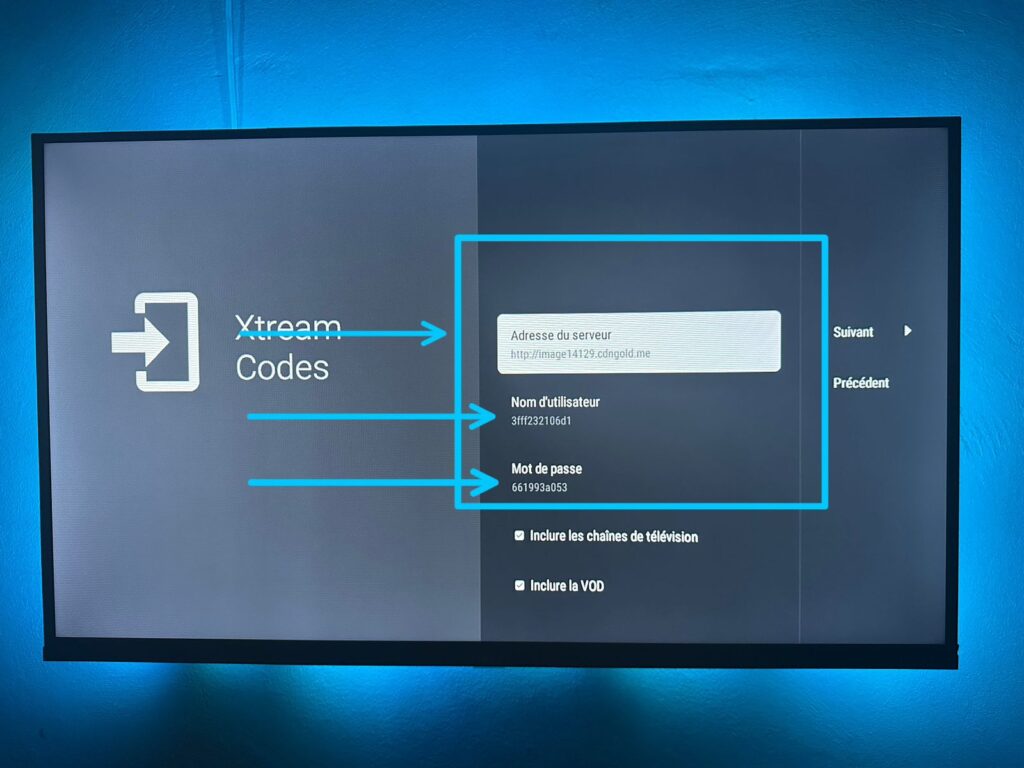
Enter the server URL, username, and password from your provider.
Pick the type that matches the details in your welcome email.
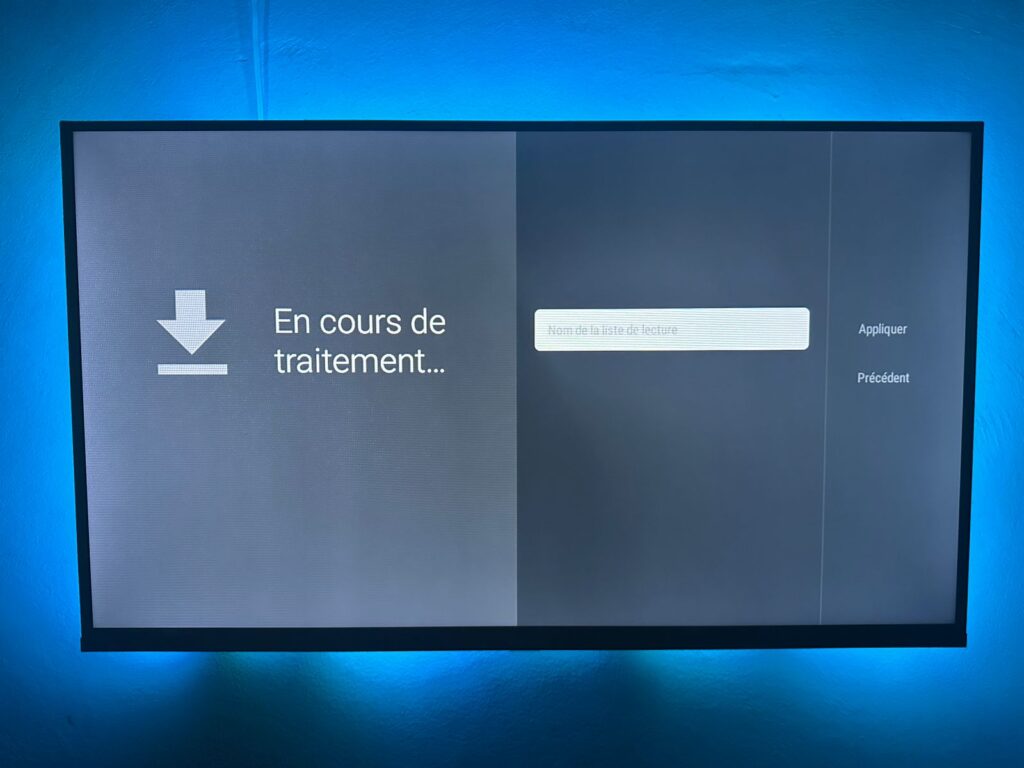
Tap Next and wait while TiviMate downloads the channel list.
Give the playlist a name and confirm.
6. Set Up the EPG (TV Guide)
The EPG is what gives TiviMate its cable-like, scrollable schedule. With Xtream Codes, the guide usually loads on its own; with an M3U playlist, you may need to add an EPG (XMLTV) URL manually. Allow a couple of minutes for it to populate.
With Xtream Codes, the guide typically appears automatically.
With M3U, open settings and add the EPG/XMLTV URL from your provider.
Wait a few minutes for the guide data to sync.
Match channels to guide data in settings if any are missing.
7. Customize TiviMate (Free vs Premium)
Once your channels load, TiviMate lets you tailor the experience. The free version handles a single playlist well; the paid Premium upgrade unlocks multiple playlists, recording, picture-in-picture, and more. If you plan to record live TV, our guide on how to record on IPTV walks through the process.
- Create channel groups and mark favorites for quick access.
- Hide channels you don’t watch to declutter the list.
- Upgrade to Premium for multiple playlists and recording, if needed.
- Adjust playback and interface settings to your taste.
8. Optimize, Secure, and Troubleshoot
A few final tweaks keep playback smooth and fix the most common issues, like buffering or a missing guide. Connection stability is the biggest factor, so prioritize a solid network. Keep the app updated for the latest fixes.
- Aim for at least 25 Mbps for HD and 50 Mbps for 4K.
- Use Ethernet (or strong 5 GHz Wi-Fi) if the picture freezes or buffers.
- If channels are missing, reload the playlist from TiviMate’s settings.
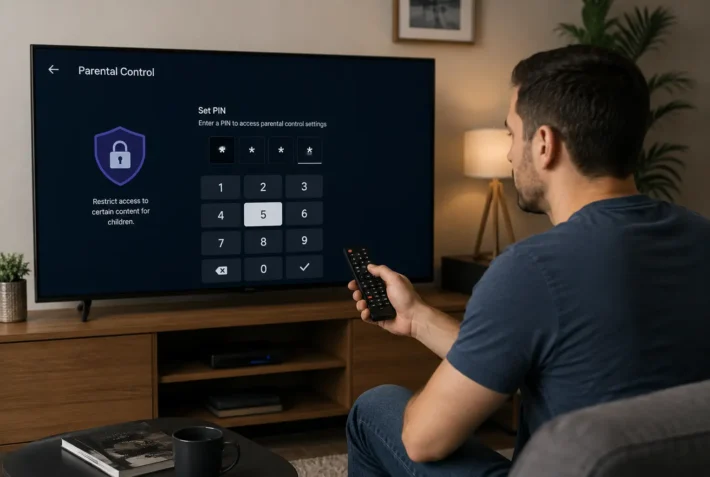
- Connect a VPN at the system level beforehand if you want to protect your privacy.
Frequently Asked Questions (FAQ)
Is TiviMate free?
TiviMate has a free version and a paid Premium tier. The free version is fully functional for everyday viewing but limits you to a single playlist. Premium removes that limit and adds features like recording, picture-in-picture, and multiple-playlist management.
Either way, TiviMate only covers the app itself — you always need a separate IPTV subscription to access content, and that’s where the real cost lies.
What devices does TiviMate work on?
TiviMate is built for Android-based devices only. That includes Android TV boxes, Android-based streaming sticks, and Android phones and tablets.
It is not available for iOS, and it doesn’t run directly on non-Android Smart TVs. If your TV isn’t Android-based, the usual workaround is to plug in an Android-based streaming device and install TiviMate there. Always confirm your hardware runs Android before setting up.
Does TiviMate include any channels?
No. TiviMate is purely a player — think of it as the dashboard, not the fuel. It has no channels of its own and does nothing until you connect it to an IPTV service using Xtream Codes or an M3U link.
Once you add valid details from your provider, your live channels, movies, series, and guide populate the app. This is why choosing a reliable, licensed subscription matters as much as the player you use.
Xtream Codes or M3U in TiviMate — which is better?
For most users, Xtream Codes is the better choice in TiviMate. It connects with a server URL, username, and password, and it automatically pulls in your channels, on-demand content, and the program guide, refreshing them over time.
An M3U link works too, but you may need to add the guide separately, and a long shareable URL is less convenient to manage. If your provider offers both, start with Xtream Codes for the cleanest setup.
Why isn’t my EPG (TV guide) showing in TiviMate?
This usually comes down to how the playlist was added. With Xtream Codes, the guide normally appears on its own within a couple of minutes; with an M3U playlist, you often have to add the EPG/XMLTV URL manually in settings.
If the guide still won’t show, give it a few minutes to sync, then reload the playlist. You may also need to match channels to their guide data in TiviMate’s settings so the schedule lines up.
What internet speed do I need for TiviMate?
For smooth, uninterrupted HD playback, plan for at least 25 Mbps, and at least 50 Mbps for 4K. Beyond raw speed, connection stability matters most: a wired Ethernet link or a strong 5 GHz Wi-Fi signal will reduce buffering, especially during busy evening hours.
If several devices use the network at the same time, add up their needs so TiviMate isn’t starved of bandwidth on the main screen.
Is using TiviMate legal in Canada?
TiviMate itself is a perfectly legal app — it’s just a player, like a web browser for IPTV. Legality depends entirely on the service you connect to it.
As long as you use a licensed provider that holds the broadcasting rights to its content, you’re in the clear.
The risk lies only with unlicensed services: distributing or copying copyrighted content without permission can carry penalties under Canadian copyright law, as a Canadian criminal-defence lawyer’s plain-language guide explains how online piracy is treated.
Be wary of offers promising thousands of premium channels for a few dollars — a classic sign of an unauthorized service.
Conclusion
Setting up IPTV on TiviMate is quick once you know the path: install the app on an Android device, tap “Add Playlist,” choose Xtream Codes or M3U, enter your provider’s details, and let it load. Xtream Codes is the smoothest route because it brings in your channels and program guide together, while the free version is enough for a single playlist and Premium unlocks extras like recording and multiple playlists.
Remember that TiviMate is only the player, the quality, stability, and legality of your experience depend on choosing a reliable subscription from a licensed provider. With a stable connection and a trustworthy service, TiviMate turns any Android device into a polished, cable-like IPTV experience on the big screen.