How to Install IPTV on Kodi ?
To install IPTV on Kodi you need to install Kodi from the official website on your device, enable installations from unknown sources in Kodi settings, install the PVR IPTV Simple Client add-on, configure the add-on with your M3U URL or Xtream Codes credentials, enable the add-on and reload Kodi to load your channel list, then test your channels and adjust EPG settings if needed.
The whole process takes about 15 minutes on most devices. A reliable IPTV Subscription from a trusted Canadian provider gives you the M3U URL, the EPG link, and full setup support, making the entire Kodi configuration straightforward and stress-free.
If you want a powerful, customizable, open-source media center to run your IPTV streams, Kodi is the most popular choice. This guide walks you through the exact installation process step by step, from download to first channel test.
Step 1 — Download and Install Kodi from the Official Website
Start with a clean, official install of Kodi:
Visit the official Kodi website at kodi.tv.
Click the Download section and select your operating system.
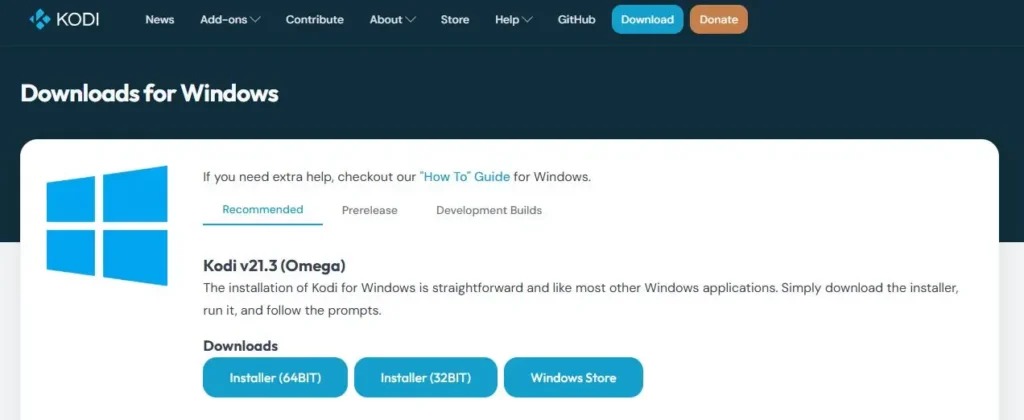
Download the latest stable release (avoid pre-release versions for IPTV).
Run the installer and follow the on-screen instructions.
Launch Kodi to confirm a successful installation.
Always download Kodi from the official source. Per the Internet Society Canada Chapter, keeping your apps and devices on official, verified channels is one of the most effective ways to avoid malware, modified clones, and tampered installers that mimic legitimate software.
Step 2 — Enable Installations from Unknown Sources
Kodi blocks third-party add-ons by default. To install IPTV add-ons, you need to enable that option first:
Open Kodi and click the Settings icon (gear ⚙️) on the main screen.
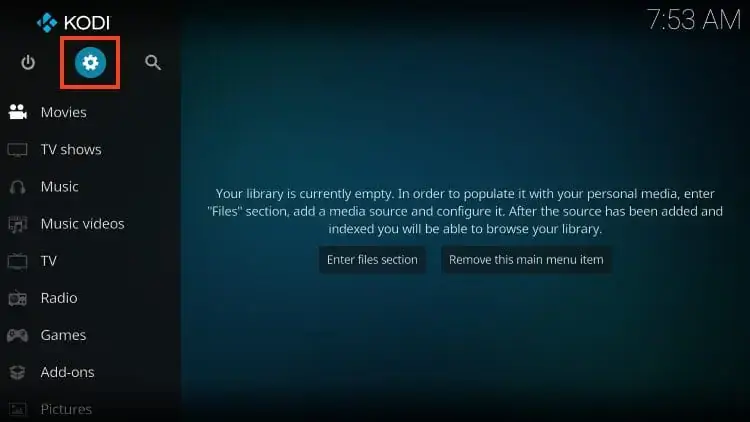
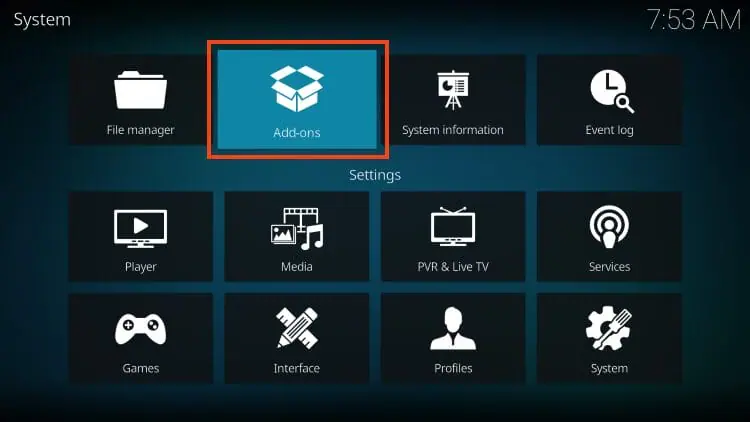
Go to System → Add-ons.
Toggle Unknown Sources to ON.
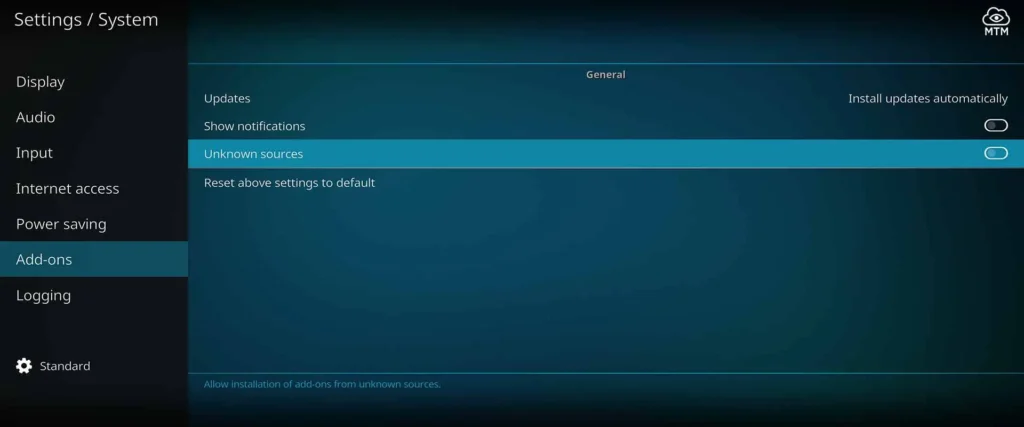
Confirm the security warning that appears.
Return to the home screen.
This setting is required only when adding repositories outside Kodi’s official catalog. Most users only need this enabled once during initial IPTV setup.
Step 3 — Install the PVR IPTV Simple Client Add-on
The PVR IPTV Simple Client is the official, built-in add-on Kodi uses to play IPTV streams:
From the Kodi home screen, go to Add-ons.
Click the Package icon (open box) at the top-left.
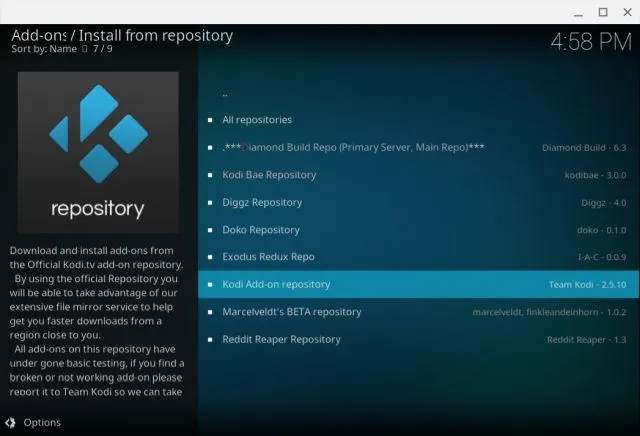
Select Install from Repository
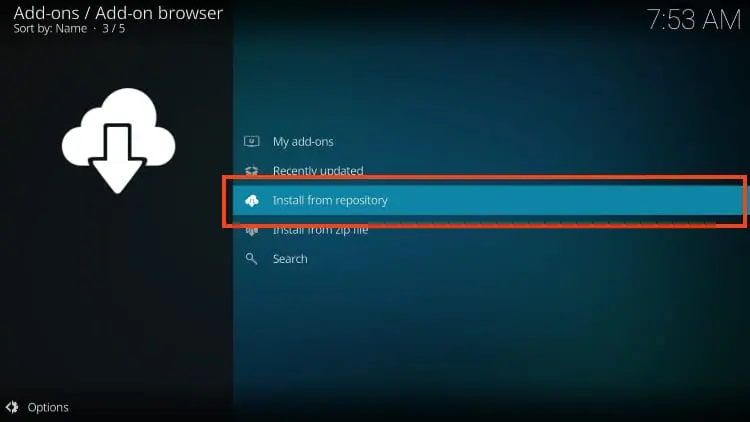
→ Kodi Add-on Repository.
Open PVR Clients.
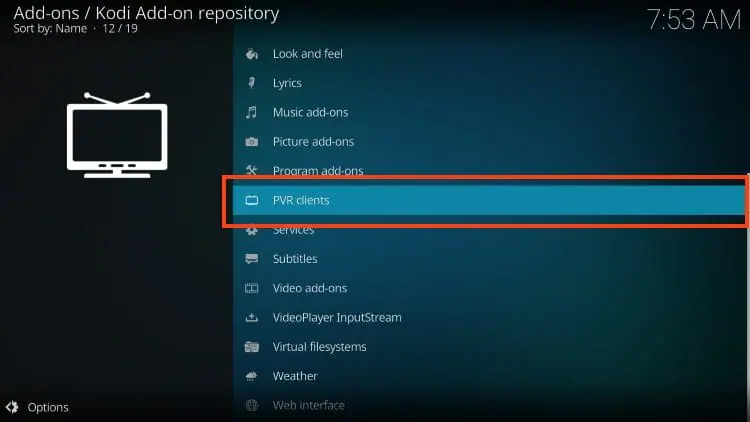
Find and click PVR IPTV Simple Client.
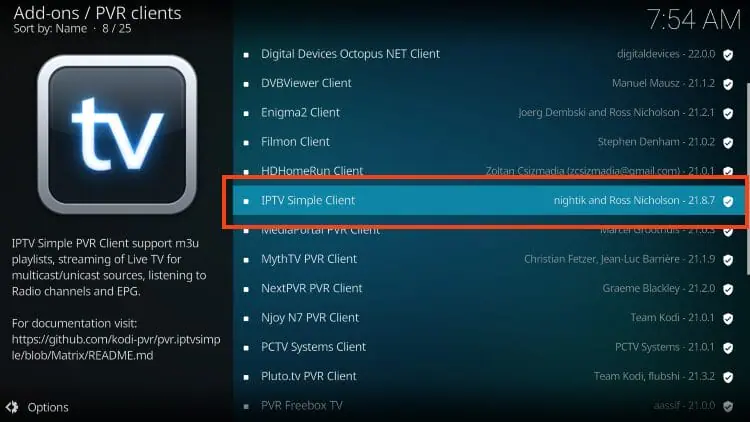
Hit Install and wait for confirmation.
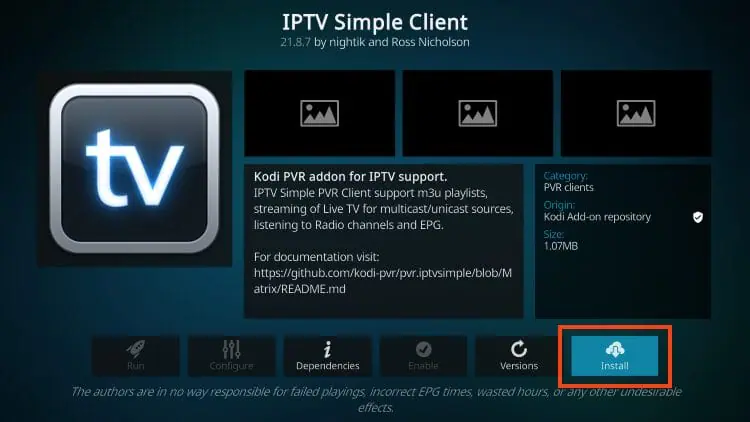
The PVR IPTV Simple Client comes pre-bundled with Kodi, so no third-party download is required. This makes it the safest option for installing IPTV on Kodi without exposing your device to unverified add-ons.
Step 4 — Configure the Add-on with Your IPTV Credentials
Now connect the add-on to your IPTV provider’s source:
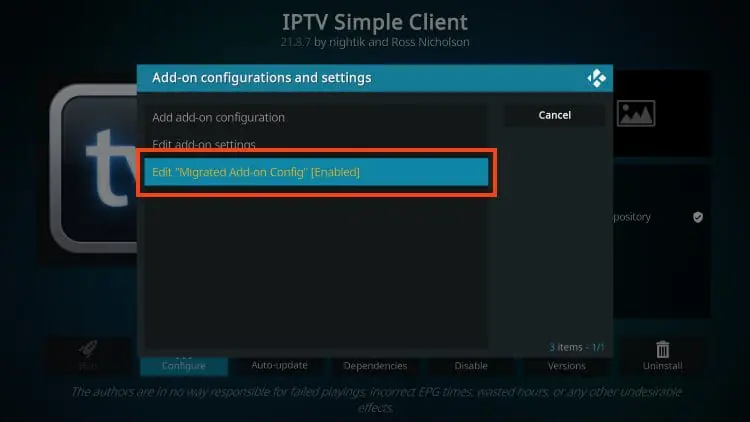
After installation, click Configure on the PVR IPTV Simple Client page.
Open the General tab.
Edit “Migrated Add-on Config”
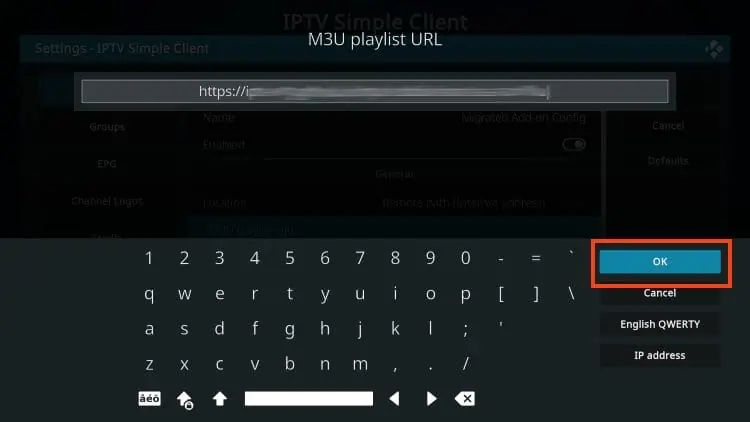
Under General, select M3U Playlist URL.
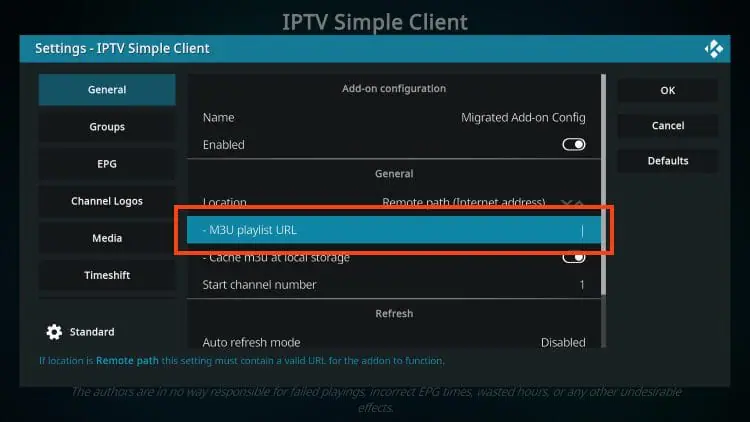
Past your M3U URL of your IPTV subscription and click OK.
If you have an EPG URL tab and paste your EPG URL (XMLTV format).
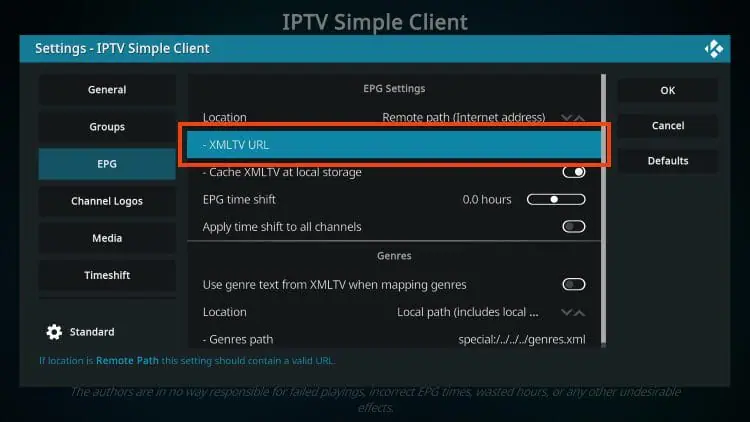
Click OK to save.
For Xtream Codes-style providers, use the Xtream Codes option if your fork of the add-on supports it, or use the M3U URL with embedded credentials. Double-check the URL for typos, even one wrong character will prevent the channel list from loading.
Step 5 — Enable the Add-on and Reload Kodi
After configuring, you need to enable and refresh the add-on:
- Return to the PVR IPTV Simple Client add-on screen.
- Click Enable if it’s not already enabled.
- Close Kodi completely.
- Reopen Kodi to allow the playlist to load.
- Wait 30 to 60 seconds for the channel list to populate.
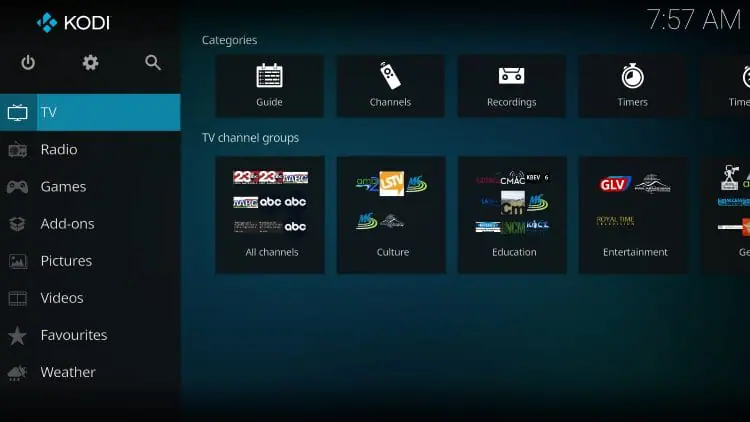
- Navigate to TV in the main menu to see your channels.
If channels don’t appear right away, restart Kodi a second time. Some Kodi installations require a full reload to fetch the entire channel list. According to Tech Safety Canada, reviewing app permissions and restarting after configuration changes is a good general practice for keeping Kodi and any third-party add-ons working as expected.
Step 6 — Test Your Channels and Adjust EPG Settings
Verify your IPTV setup works smoothly before settling in:
Open the TV section from Kodi’s main menu
Browse the channel list and pick a few channels to test
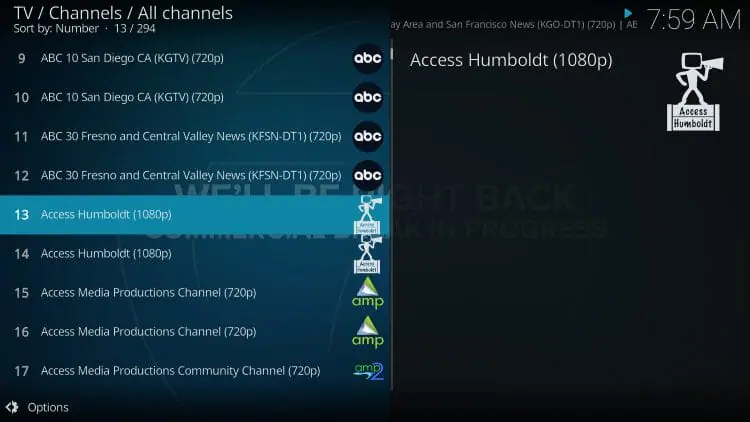
Confirm channels load within 3 seconds
Open the program guide and confirm the schedule looks accurate
Test the EPG (program guide) to confirm it displays current and upcoming shows
Test playback during peak hours (7 to 10 PM) for real-world stability
If channels load but the EPG looks empty, return to Step 4 and verify the EPG URL is correct. If channels themselves fail to load consistently, the issue is most likely with the M3U URL itself or with your provider’s servers — not Kodi.
Conclusion
Installing IPTV on Kodi turns it into a powerful, fully-featured streaming hub at zero software cost. The process, official Kodi download, unknown-sources permission, PVR IPTV Simple Client install, M3U/EPG configuration, and channel test, works reliably across every device that runs Kodi. Once configured, your channel list, EPG, and playback are all unified into one polished interface that rivals premium boxes.
The most important factor isn’t the technical setup itself, but the quality of the IPTV source feeding Kodi. A great Kodi configuration on top of an unstable provider will still buffer; a basic Kodi setup on top of a reliable, well-maintained service runs flawlessly.
Choose your IPTV provider for stability, transparent licensing, and 24/7 support, Kodi will handle the rest beautifully.
Frequently Asked Questions
Is installing IPTV on Kodi legal in Canada?
Yes, the Kodi software itself is fully legal in Canada, as is the PVR IPTV Simple Client add-on. What matters is the source of your IPTV streams — using a licensed provider keeps you fully on the right side of copyright law.
Do I need to pay for Kodi?
No. Kodi is free, open-source software developed by a non-profit foundation. There is no subscription or licensing fee for the software itself.
Can I install Kodi on my Smart TV?
It depends. Kodi runs natively on Android TV and Fire TV. On other Smart TVs, you need an external device (Android TV box, Fire Stick, etc.) running Kodi.
What’s the difference between M3U and Xtream Codes in Kodi?
M3U is a static playlist URL. Xtream Codes is a more advanced authentication method using server URL + username + password, with auto-update and richer EPG support.
Why don’t my channels load after installing the add-on?
Most often it’s a typo in the M3U URL, an expired link, or the unknown-sources option being disabled. Re-check the URL and the toggle in Step 2.
Can I install multiple IPTV providers on the same Kodi setup?
Yes, by installing additional instances of the PVR IPTV Simple Client (forked versions) or by switching M3U URLs in the same configuration when needed.
Does using Kodi for IPTV require a VPN?
Not necessarily. A VPN helps if your ISP throttles streaming traffic or if you need extra privacy, but a reliable provider with stable Canadian servers usually doesn’t require one.
Which version of Kodi works best for IPTV ?
The latest stable Kodi release (Kodi 22 “Piers” or newer) is the recommended choice for IPTV. It includes the most up-to-date PVR IPTV Simple Client, better hardware acceleration, and improved compatibility with modern stream protocols. Avoid pre-release or nightly builds for IPTV use.
Why is the EPG empty in Kodi after installing IPTV?
This usually means the EPG URL wasn’t entered, or it’s pointing to an invalid source. Open the PVR IPTV Simple Client → Configure → EPG Settings, paste your provider’s XMLTV URL, and trigger a manual refresh. The EPG can also take 30–60 seconds to fully load after the first sync.
Does Kodi support 4K IPTV streaming?
Yes, Kodi supports 4K UHD playback when running on capable hardware. For smooth 4K streams, you’ll need a device with hardware acceleration support (Fire TV 4K, NVIDIA Shield, Android TV boxes with HEVC decoding) and a stable internet connection of at least 50 Mbps.
Why does Kodi keep buffering on certain IPTV channels?
Buffering on Kodi typically points to one of three causes: a slow internet connection, an underpowered device, or an overloaded provider server. Try switching the player engine, increasing the cache size in advancedsettings.xml, or testing the same channel on another device to isolate the issue.
Can I record live IPTV in Kodi?
Yes, but it requires a more advanced setup. The PVR IPTV Simple Client supports recording when paired with timeshift or DVR functionality. You’ll need to enable timeshift in the add-on settings and provide a folder for recordings, ideally on external storage.
Is there a parental control option in Kodi for IPTV?
Yes. Kodi includes a built-in parental control system under Settings → PVR & Live TV → Parental Control. You can set a 4-digit PIN, hide adult channels, and require the PIN to access certain channel groups. Useful for households with children.
What’s the difference between PVR IPTV Simple Client and other Kodi IPTV add-ons?
The PVR IPTV Simple Client is the official, built-in add-on developed by the Kodi team. It’s stable, regularly updated, and works with virtually any IPTV provider. Third-party add-ons may offer additional features but often come with stability issues, security risks, or potential legality concerns.